
Phone templates in 3CX are important files that allow phones to be provisioned. They include values that allow the PBX to generate configuration files. These are sent to a phone to give it extension details, ring tone, date, VLAN tags and more. Grandstream, Polycom, Yealink, Snom and Cisco phones that have undergone interop testing with 3CX, have built-in templates.
3CX’s management console also has a handy template editor. Changes can be made to customise settings that may not be supported out of the box. As a disclaimer, any phones provisioned with custom templates are not officially supported by 3CX. If the device malfunctions due to a template error, official support channels will request for the unit to be factory reset and provisioned with the standard 3CX template for testing. Custom templates can be used by resellers to standardise settings and much more.
3CX have a few golden rules when it comes to creating custom templates.
- Avoid duplicates of the same instruction (provisioning parameter) to the device.
- Refer to the provision guide of the vendor, not 3CX support for “how to questions”.
- If a value should be changed from B to default device value A, do not just delete the provisioning entry. Set it actively back to A.
- Never alter the “ua=”XXXXX”” definition in the template model definition.
- If in doubt, contact the IP phone vendor for more information.
- Seek help in the 3CX forums (or reach out to us at SofSol!).
- Remember to restart the management console after changes.
- Re-provision the phone after changes.
- Remember all phones using the same template update to the latest changes within 24 hours (exceptions apply).
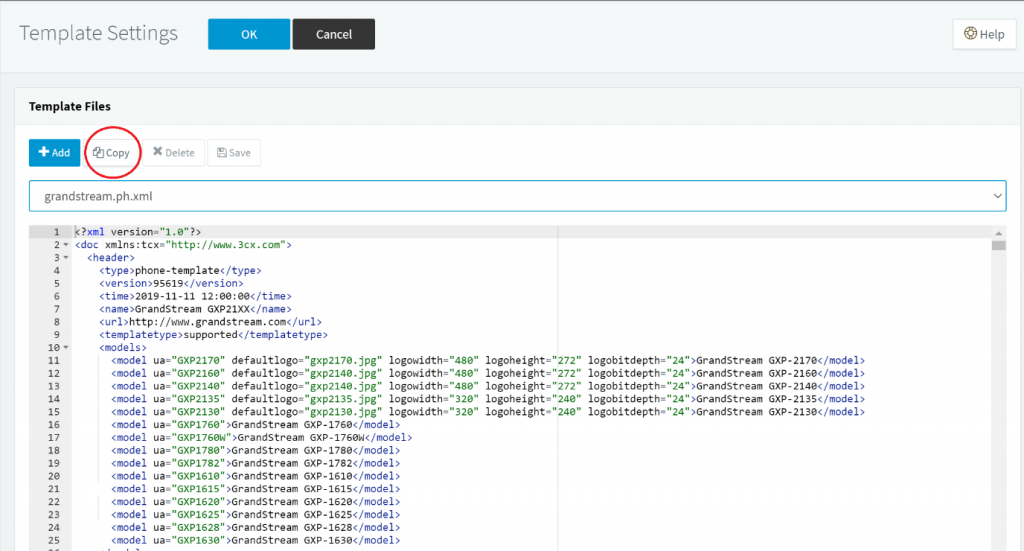
As a rule of thumb, you should never overwrite the official 3CX templates. For devices that already have a template, a copy should be made from within the management console. This creates a new custom template, and leaves the original intact. This is important in case something goes wrong, you can revert to the original template to get the device operational again. A copy is made from the management console by going to Settings – Templates, and clicking the copy button.
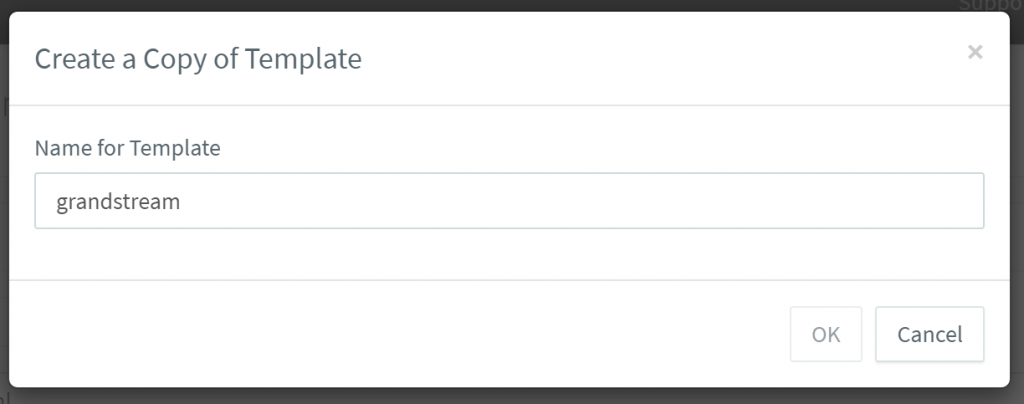
After clicking copy, it will prompt for a new template name. Give it a meaningful name for ease of identifying this specific template, when provisioning phones.
Unofficial templates also exist that can be added into 3CX to support devices that may not have undergone official interop. These templates are generally available from the hardware vendor themselves, typically whilst a device is undergoing testing. These files can be added manually into the following directories within the 3CX folder.
Windows – “C:\ProgramData\3CX\Instance1\Data\Http\Templates\”
Linux / Debian – “var/lib/3cxpbx/Instance1/Data/Http/Templates/ “
The management console will need a restart to show the new templates in the system. Examples of common templates we get requests for, are the new Grandstream WP8xx series that are currently undergoing interop and the DECT DP7xx series.
Provisioning with a custom template is a little different from the normal Plug and Play provisioning method. It is strongly recommended to factory reset the device before provisioning with a custom template as it provides a clean slate to work from. After a reset, phones can be provisioned as follows –
- Open the Management Console and go to the “Phones”
- Find the IP Phone you want to provision and highlight it.
- Press Add/Assign Ext depending on what you want to do.
- In the “Phone Provisioning”tab copy the MAC address of the existing device.
- Press the “Delete”button next to the “Your phones” drop-down.
- Press the “Add”button and in the new window that opens.
- Select the custom template name from the drop-down.
- Paste the MAC address you copied in step #4.
- Press OK, then OK again to save the extension.
- Go to the “Phones”node, highlight the phone and press re-provision.
A long time ago each device model had its own individual template for setup. Modern templates are a lot smarter with their layouts utilising the likes of IF statements to have model specific settings trigger within a single template. Models are identified by their user-agent that will be matched to that specific phone model. It is important when editing templates to not modify the user-agent name as it will no longer be able to match against the phone, and thus won’t provision correctly. In the following example you can see the UA (user-agent) defined for the Grandstream phones this template supports. This declaration is typical for most phone templates.
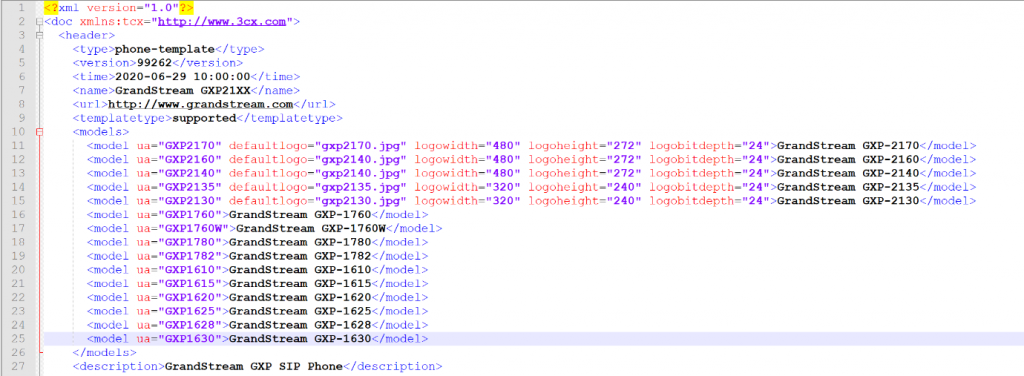
Notably with official (and most unofficial) templates we can see that the template has a publish date and version number to see how current it is. Official templates in 3CX will have updates made available to them via the management console, as new versions are released. Phone templates are typically split into 2 key sections. The top block of the template has the boilerplate 3CX parameters which are translated by the system to generate a configuration file for the phone. This block generally ends with the device configuration filename that 3CX will create when a phone is provisioned. It is not recommended to change much of this top block, as it can cause errors when 3CX can’t translate the settings correctly.
The bottom block of the template is a different story. This block pertains specifically to the vendor’s own settings. All vendors have different ways of translating this block’s values and there isn’t a solid uniformity across them. For example, Grandstream uses a P value based system (P1, P21, P35, etc) to tag different settings and Yealink uses a name1.name2 syntax (local_time.time_zone , phone_setting.headsetkey_mode , etc) as a couple of examples. Vendors are generally very good at commenting within the template as to what the specific value sets. The following is an excerpt of the Grandstream official template.

We can see that value P1379 controls the unit of measurement for the weather application on the phone. The first line gives the values that this variable can be set to, with the default setting as Automatic. The XML syntax is important here with care to set a value that is accepted and not to remove the closing tag or leave whitespace. In the case of New Zealand, we can set this as follows
<P1379>c</P1379>
With this saved, we can then provision any Grandstream phone with a supported user agent with this template and have the weather app reflect Celsius by default. This can be handy when using overseas DNS servers that may not reflect the correct country to the phones. Overseas DNS can sometimes be problematic with the weather app location as well. The template setting for this is as follows:
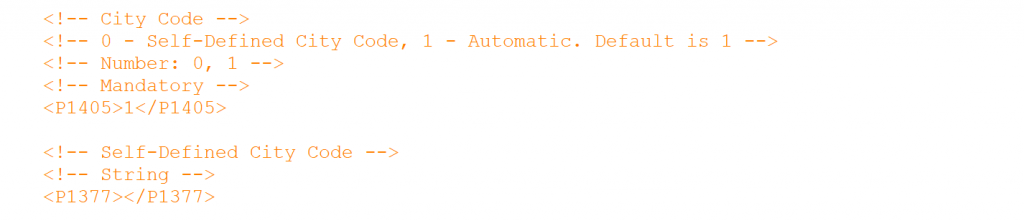
We have a couple of values to set here. P1405 sets whether or not the location is set to Automatic or a Self-Defined City Code. The default value is 1 for Automatic. Our first step here is to set the template to enable a Self-Defined location.
<P1405>0</P1405>
The next value is the Self-Defined City code itself. By default there is no value between the tags, which we need to remedy to add our location. City codes can be looked up via https://weather.codes/ . Enter in our location and click search, and it will reveal our city code.
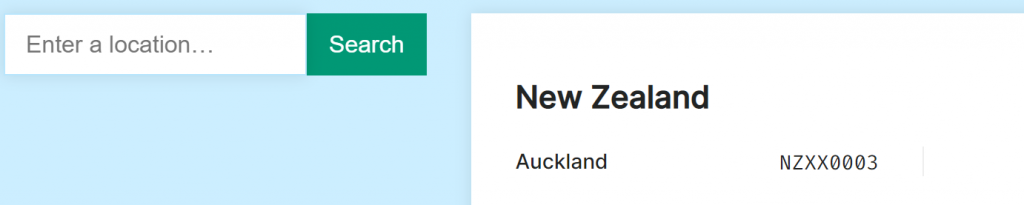
Our city code for Auckland is NZXX0003. Now we can set the P1377 value
<P1377>NZXX0003</P1377>
After the template has been saved, any device that is provisioned with it will show Auckland as the location for the weather app’s city. With all of these changes saved to the template, any devices provisioned with it will reflect our city’s location in Celsius. These settings could also be set by going into the phone’s web UI, however when the phone does its daily re-provision against 3CX, the settings will be wiped out as they will go to the default template where no values were present except for Automatic. By hard coding these values into a template, they will persist across re-provisions against the system.
The vendor block of the template often has a variable designated by a %%value%%. This variable’s value is pulled from 3CX itself to populate the setting and is how the vendor block of code is set to 3CX parameters. These aren’t usually changed, but they can be set in exactly the same way we did with the weather app. Before 3CX had the ability to bulk extension edit BLF keys, this was a more technically advanced way of hard coding and standardising BLF keys across a phone system. Thankfully most settings on supported phones can now be set on the phone provisioning tab within 3CX. This includes the VLAN tag, blind or attended transfer by default, default ringtone, etc.
Custom templates are not included in a 3CX backup by default, and need to be selected in the backup settings to be added to it. They can be a handy way of changing phone settings that may not be supported out of the box, as well as a method of standardising settings across installs.
After you’ve absorbed all of this data, you may have questions or need assistance.
Reach out to us on voip@sofsol.co.nz. Matt Carey (Senior Engineer) is available to share his years of knowledge and for you to pick his brains.
![]()